Nail Model

Nail Model
Nail Model 01


Nail Model
Nail Model 02


Nail Model
Nail Model 03


Nail Model
Nail Model 04


Nail Model
Nail Model 05


Nail Model
Nail Model 06


Nail Model
Nail Model 07


Nail Model
Nail Model 08


Nail Model
Nail Model 09


Nail Model
Nail Model 10


Nail Model
Nail Model 11


Nail Model
Nail Model 12


Nail Model
Nail Model 13


Nail Model
Nail Model 14


Nail Model
Nail Model 15


Nail Fashion

Nails manicured and well combed always are a strong indication of the personality of a person and also to reflect your style. Today nails fashion trend is greatly tilted toward the nail art that is not only unique in all aspects, but also gives you a stunning look at otherwise boring nails. A lot of youth and fashion conscious women are taking the art of nails as the best way to get rid of boring looking for plain nails. From only using one color on your nails, nail art enhances the beauty of the nails with its innovation in the form of small motifs, pendulums, stones, shine, flowers, ceramics, etc. that will make your nails stand out for any occasion.

Creating decorative designs on nails not always it is easy and requires a lot of creativity and professionalism, especially if you are planning some intricate designs. A well-done art can brighten your overall appearance and complement your outfit by far. Nail art design can vary from subtle and delicate designs, bold designs and funky. Nail art requires some basic steps to follow to obtain the application perfectly. Before you begin the design, be sure to clean and the nails in the form correctly. Trim nails and the presentation are necessary to obtain the best result. Even the best performers cannot create beautiful designs on your nails if they are in a bad state and not very well kept. You can also consider using acrylic nails if your nails are in a very bad state and beyond repair. The art design on these acrylic artificial nail can then be painted.


Nail Fashion
Nail Fashion 01


Nail Fashion
Nail Fashion 02


Nail Fashion
Nail Fashion 03


Nail Fashion
Nail Fashion 04


Nail Fashion
Nail Fashion 05


Nail Fashion
Nail Fashion 06


Nail Fashion
Nail Fashion 07


Once your nails are painted with a base coat, you can create your designs using the nail arts brushes that are available in different sizes based on the design you want to draw. Intricate designs will require more thin tipped and finer nail brushes to get the design right and visible. The use of toothpicks is also not uncommon especially if you are a beginner and want to improve your designs. For any nail polish application mistakes, you can use cotton swabs to remove the excess color. Make sure you do it quick as nail polish dries very fast. It is also good to use a different brush for each nail polish color so that you can save time. Nails art designs can be created using different methods. Novices mostly prefer to create their designs by copying them from nail art books or seeing them on the Internet. One can also learn nail arts through courses offered by some professional nail salons. However, even if you possess minimal artistic capability, you can create simple easy floral designs or geometric shapes which do not require high end training.

While much of the nail art designs use a combination of nail polish colors, one can also add some glitter into the nail polish before painting to jazz up your nails. The use of other nails art accessories like rhinestones, acrylic stones, 3D nail stickers, ceramic flowers, fimo art pieces, crushed shells, etc to name a few are also being widely used to highlight the nails and give them a more sophisticated look. Once you have completed your nail designing, it is important to maintain your nails properly to prevent your nail arts from chipping and to last long. The best would be to apply a clear nail polish coat over your nails every 2 to 3 days and try wearing gloves while working to prevent any nail damage. Most important, avoid biting your nails to keep your nails in good condition and also your nail art intact.

piCture pOlish: Siren Song


Yay it is mid-week!
By way of an update, I have already mixed up enough polish to fill most of the pre-orders for the Catching Fire collection. I am expecting a shipment of the mini bottles today and I will be able to start pouring and packing them - hopefully by the end of the week! I also aim to get the Christmas duos done by this week so I can get them to you before Christmas! :D Pre-orders for the Christmas duos close tomorrow at 9am, SGT.

Enough side tracking! Today, I have another beauty to share with you:


Siren Song. 2 thin coats.

piCture pOlish's Siren Song is a beautiful seafoam green filled with micro silver glitters that give it a most delicate shimmery look. It is no secret that I love seafoam greens and this is just perfect! I must admit I love the name and the tagline too. Rebecca really did a great job with this one.

Application is a little streaky on the first coat but it evens out on the second. The glitters tend to stick to the side of the bottle so I would recommend a good shake before application.

So what do you think of Siren Song?

Siren Song is available at piCture pOlish's website and through its network members. You can follow piCture pOlish on Instagram, Twitter or Facebook for more updates and new releases as well!

 photo xoxo_zpsaad7ebe5.png

**Products were provided for our honest review. Please see our disclosure policy for more information.**

The Polish Well: Christmas Duo!


Happy weekends everyone!
Even though it is a gloomy rainy Saturday, I am still riding on a high from my most amazing nail mail week - you can catch a glimpse of the pretties that I've hauled on my Instagram page.

Since I can't do any swatching today, I looked through my pictures and I stumbled upon a prototype that I've made a while back during Halloween. I did not release it then because I've received a number of comments that it was more suited for Christmas! One thing led to another and before I knew it, I had mixed up another prototype to go with it as a Christmas duo.


Naughty or Nice.
A daring shade of deep berry-leaning red filled with holographic sparkles and a dash of holiday gold. Sparkly reds are Christmas classics so I simply had to try making one myself. More pictures below.

the-polish-well-naughty-or-nice1
Bottle shot - macro
the-polish-well-naughty-or-nice2
Shot under direct sunlight
the-polish-well-trim-the-tree

Trim the Tree.
A forest green filled with yellow and hot orange / red glitters. I hardly do contrasting colours myself but this one grew on me the more I stared at it.

So what do you think of these two colours? What do you like to wear on your nails for Christmas?

Pre-order Information:

As before, I will be making these polishes available for pre-orders from Sunday, 17 November, 9am SGT until 21 November, 9am SGT.

If you wish to place an order for the older colours, you may also include them in your order list and I will see if I have any available stock for you.

All colours will be available in the following sizes:
12ml @ US$10 each
5ml @ US$4 each

All orders will be mailed via Registered Mail and shipping rates are as follows:
International: US$6 for the first 12ml / US$3 for the first 5ml + US$2 for each subsequent 12ml + US$1 for each subsequent 5ml
Singapore: flat rate of US$4
IF YOU HAVE PLACED AN EARLY PRE-ORDER FOR THE CATCHING FIRE COLLECTION THAT IS STILL BEING PROCESSED, PLEASE INDICATE IN THE "REMARKS" SECTION AND I WILL COMBINE YOUR ORDERS FOR YOU.

Please note that pre-orders will be filled as quickly as I can (but I cannot guarantee they will reach you before Christmas!) and they will be filled on a first-come-first-served basis according to the timestamp on the pre-order form.


 photo xoxo_zpsaad7ebe5.png

China Glaze - When Stars Collide

Hello dear readers!

Today, I'm going to show you swatches of China Glaze - When Stars Collide. I wore this color last month but couldn't post it because I wanted to post Halloween manicures... so here it is.

 When Stars Collide is a maroon color holographic nail polish. It was part of the China Glaze Hologlam collection.

Here you can see the holographic shine. The holo effect is not as strong as on previous collections but I like the subtle metallic finish.

I experienced a bit of difficulty in application such as bald spots and dragging when I applied a 2nd coat. Not too bad but still, not a perfect application.
Here I posted swatches for CG Strap on your Moonboots, another nail polish from the hologlam collection.

What do you think of this nail polish?
♥♥Thank you for reading♥♥

The Polish Well: Catching Fire


Hands up those who are excited about the upcoming Hunger Games: Catching Fire movie!! *sticks arms up and jumps around wildly*

Ever since I've read the books last year, I have been completely hooked onto this series and there was no turning back. So when I found out that Catching Fire movie was scheduled for release this 21 November, I jumped right into bed that same evening and re-read the Catching Fire book in one night. Naturally, with the story swimming around in my head, my brain went on turbo mode and before I knew it, I'd already made up my mind to do a mini Catching Fire collection. :P


the-polish-well-the-wedding-dress

the-polish-well-the-wedding-dress1The Wedding Dress. (3 thin coats)
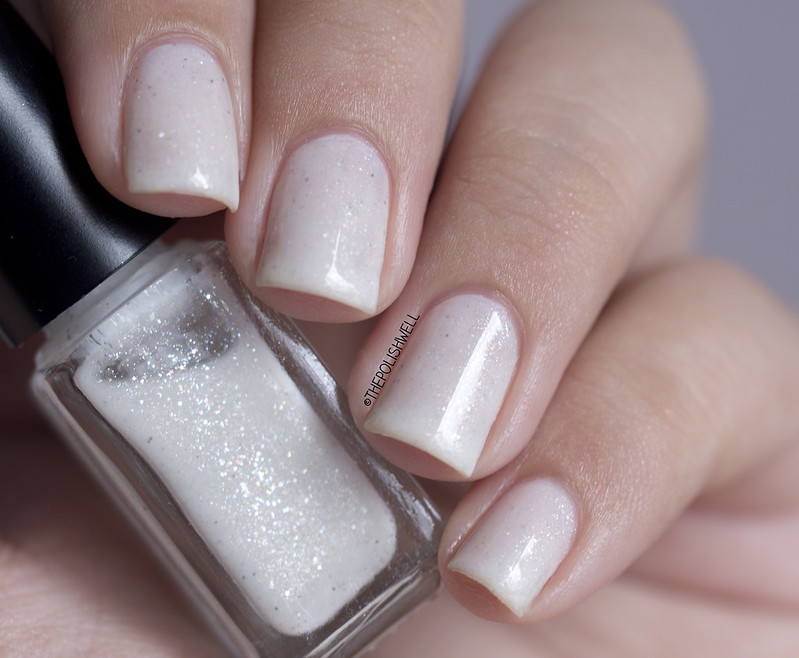
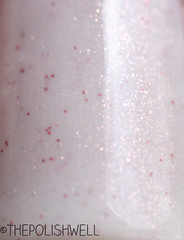
Heavy white silk with a low neckline and tight waist and sleeves that fall from my wrists to the floor. And pearls. Everywhere pearls. Stitched into the dress and in ropes at my throat and forming the crown for the veil.
A sheer white base filled with delicate shimmers and small silvery holo glitters. I nearly tore my hair out in frustration trying to capture this colour accurately. None of my pictures does it any justice. The glitters are more obvious and sparkly in real life. Under the light, it shimmers and glimmers with tiny holo sparkles. I am really happy with how it turned out.
the-polish-well-roses-and-blood

the-polish-well-roses-and-blood1Roses and Blood. (3 thin coats)
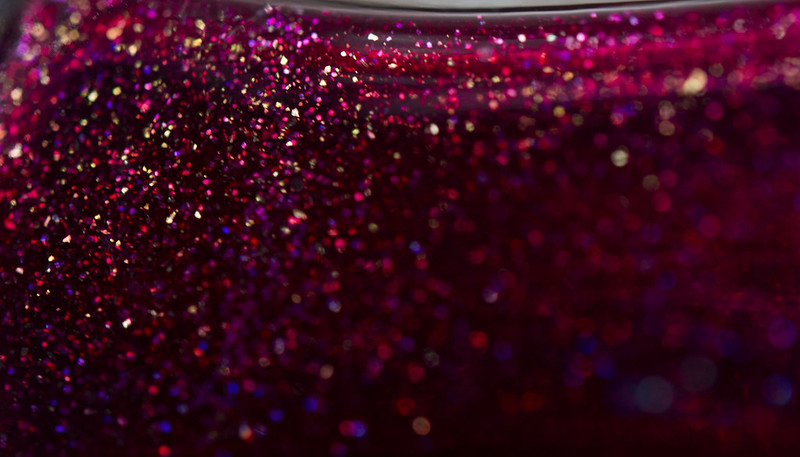
The smell of roses and blood has grown stronger now that only a desk separates us. There's a rose in President Snow's lapel, which at least suggests a source of the flower perfume, but it must be genetically enhanced, because no real rose reeks like that. As for the blood ... I don't know.
A delicate white base lightly tainted with red shimmers and a whiff of tiny bright red glitters. At least that is what I imagine President Snow's scent would be like in a nail polish bottle. Don't worry, I left it unscented.
the-polish-well-no-nightmares

the-polish-well-no-nightmares1No Nightmares. (3 coats)
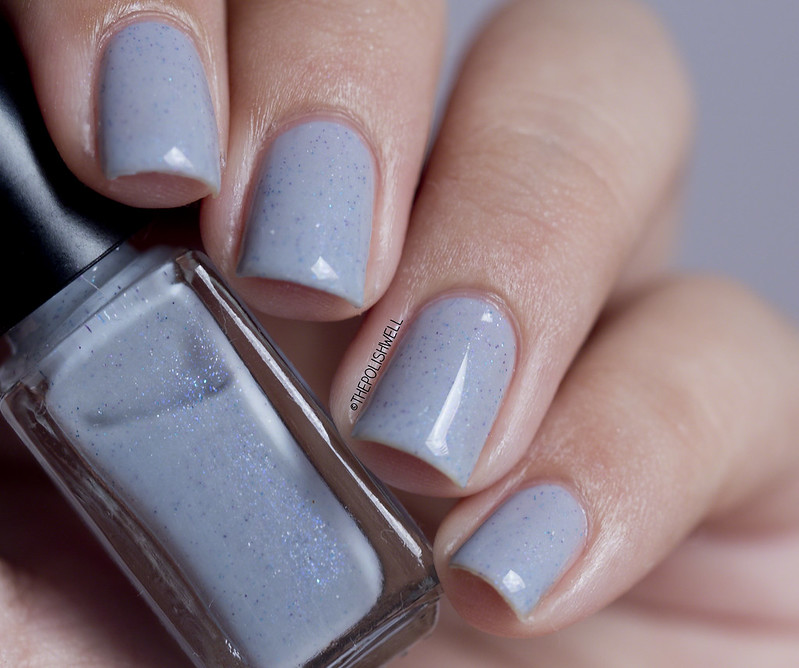
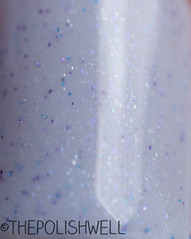
When I open my eyes, it's early afternoon. My head rests on Peeta's arm. I don't remember him coming in last night. I turn, being careful not to disturb him, but he's already awake.
“No nightmares,” he says.
“What?” I ask.
“You didn't have any nightmares last night,” he says.
He's right. For the first time in ages I've slept through the night.
Oh Peeta! You make me melt ♥ No Nightmares is a light blue-grey filled with delicate sprinkles of purple and blue micro-glitter and light shimmers. A beautiful accident for I did not set out to create this colour. For some reason, it gave me a warm, safe and fuzzy feeling - just like what I imagine Katniss would feel on a night like this with Peeta.

the-polish-well-breaking-out

the-polish-well-breaking-out1Breaking Out. 4 thin coats but also opaque on 3 thin coats.
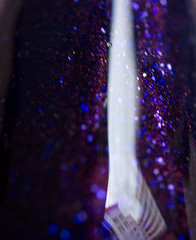
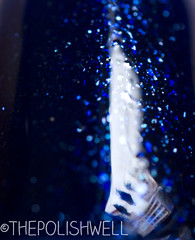
A flash of white runs up the wire, and for just a moment, the dome bursts into a dazzling blue light. I'm thrown backward to the ground, body useless, paralyzed, eyes frozen wide, as feathery bits of matter rain down on me. I can't reach Peeta. I can't even reach my pearl. My eyes strain to capture one last image of beauty to take with me.
Right before the explosions begin, I find a star.
A deep blue jelly filled with silvery shimmers and micro-flakes that glow a a bright blue against the dark base. I tried very very hard to put in a lightning in the bottle but the closest I could get was how I imagine the night sky to look on the day of their break out. My camera freaked out a little from the shimmers buried in the base and I couldn't get a clearer picture of the delicate shimmery effect. You can see it on the swatchstick here. 3 coats are sufficient for opacity but I used four coats in the swatch above for a deeper blue.

the-polish-well-catching-fire1

the-polish-well-catching-fire2
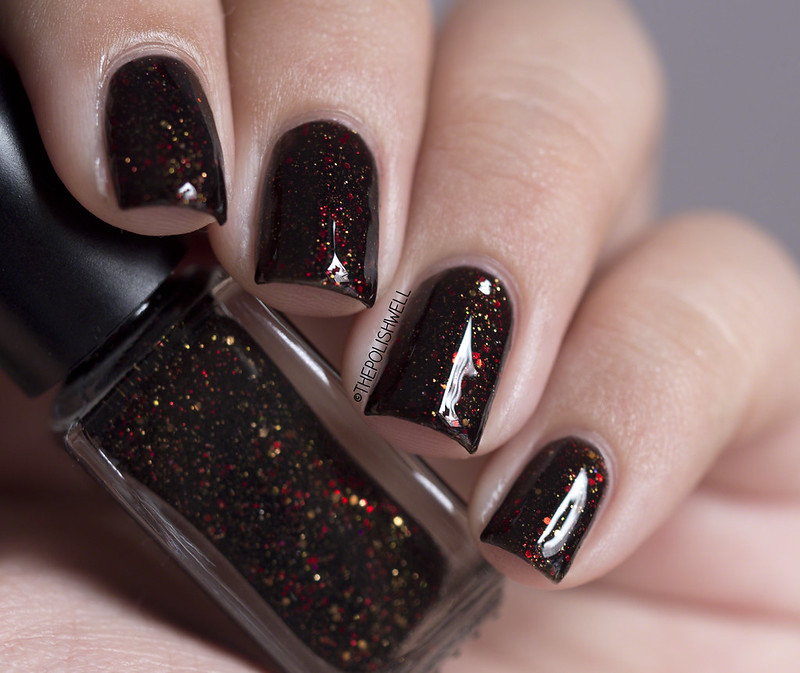
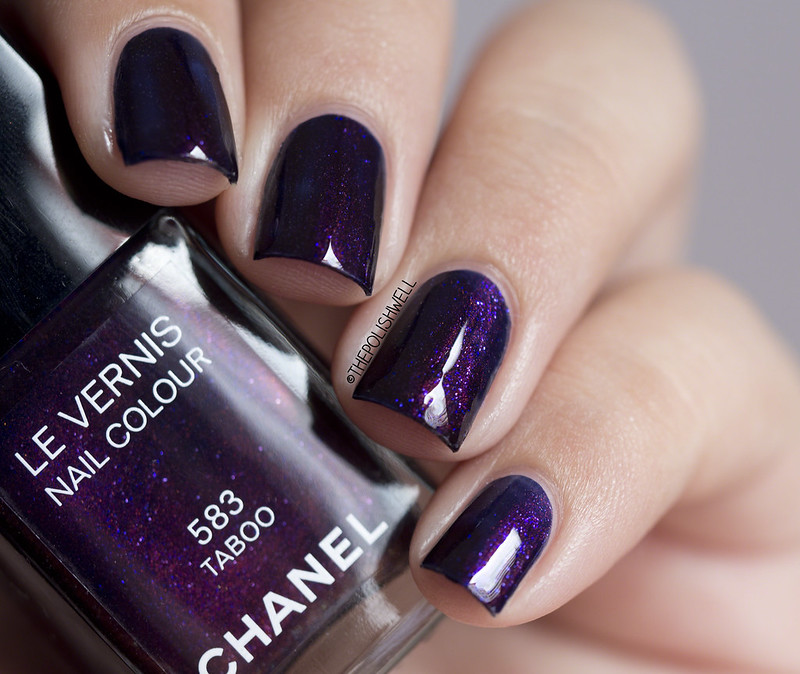
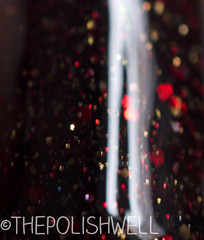
Catching Fire. 3 thin coats.
I look down, fascinated, as my ensemble slowly comes to life, first with a soft golden light but gradually transforming to the orange-red of burning coal. I look as if I have been coated in glowing embers — no, that I am a glowing ember straight from our fireplace.
A sheer black base filled with glowy red glitters and copper/gold shimmers for that glowing ember look where the glitters catch the light. Not as fiery as a fire but burning within nonetheless.


So, what do you think of this collection? Which one(s) caught your eye?

PRE-ORDER INFO:

As with the other collections, the Catching Fire collection will be made available for pre-orders from tomorrow, 10 November 2013 at 7pm SGT.


  • Colours are available in the following sizes:
    • 12ml - US$10 each
    • 5ml - US4 each
  • Shipping rates are as follows:
    • International:
      • US$6 for the first 12ml / US$3 for the first 5ml
      • US$2 for each subsequent 12ml
      • US$1 for each subsequent 5ml
    • Singapore: Flat rate of US$4
  • This pre-order ends 17 November 2013 at 7pm SGT
  • Form embedded at the end of this post.


If you wish to place an order for the older colours, you may include them in your order list and I will see if I have any available stock for you.

GIVEAWAY:

To celebrate reaching 10k followers on Instagram, I am also holding a giveaway on Instagram! One lucky winner will walk away with a set of minis of this Catching fire collection. Please feel free to hop over to IG to participate in the giveaway :) Rules are available in this post.

May the odds be ever in your favour <3

 photo xoxo_zpsaad7ebe5.png

Chanel: Taboo


I have some serious backlog here but I didn't have time to do much swatching this weekend :( Instead, I've decided to share a twinsie post that I've done with the lovely Camila (@paintedmimi on IG) a while ago!

And the star of the post? None other than... my very first Chanel - Taboo ♥


To be honest, I wasn't on the hunt for Taboo in particular. Don't get me wrong. It is a gorgeous colour but the price tag always stopped me from getting any Chanels. My resolve wavered when I saw it in Hong Kong and tried it on my friend's nails (mine were painted, of course) and it was love. Thereafter, I hunt for it at every Chanel counter / store I came across. The prices in Hong Kong were still a bit steep at around S$30 so I took a gamble and decided to check it out at Changi Airport instead. The minute I saw that it was S$27, I crumbled, grabbed it in a heartbeat and checked out my purchase before I could stop myself. :P

And I must say, I don't regret it at all! Take a look:

chanel-taboo1

chanel-taboo2
Taboo. 1 glorious coat.
A beautiful deep blue base packed with red shimmers and a scattering of electric blue sparks for that mysterious sultry look. Most of the time, it looks like a deep velvety purple because of the red shimmers in the blue base. Although there are several vampy shimmers in the market, Taboo manages to set itself apart from the rest. I love how the shimmers changed the overall colour. I also love how the random blue sparkles glow against the dark base. It is simply perfection ♥


I thought Taboo couldn't get any more perfect but boy was I wrong. Application was a dream. The formula was buttery smooth and extremely pigmented - one coat was all it needed. The brush was also easy to control and fans out nicely for easy application. To top it all off, the bottle is an elegant square which makes storage a dream! It certainly doesn't hurt that it has a lovely Chanel logo at the top too ;)

To sum up my first Chanel experience? LOVE.

What do you think of Taboo?
Do you have any high-end polishes? What do you think of them - are they worth the price tag?

Need more picture to ogle at? Don't forget to take a look at Taboo on Camila too!


 photo xoxo_zpsaad7ebe5.png

2x1 Día de Muertos Nail Art

Hello dear readers!

Today I will be showing you two different Día de muertos (Day of the dead) nail art in the same post ;)
I wanted to try a more traditional one and a simpler one, but with a similar theme.

More detailed pictures and details below....

As I wrote on my día de muertos post from last year, Nov. 1st (children) and Nov. 2nd (adults) are days for Mexicans to remember our loved ones who are no longer with us. We prepare an altar with elements such as fruits, food, and other elements that are supposed to guide the spirit of our loved one to us and then back to the afterlife.
(A  traditional día de muertos altar)

Now, this theme translated to nail art...

*I added the dead lovers as the center of this nail art as a symbol of love after death. 
Absence does not mean forgetting.
There will always be a very special place in our hearts for those who have gone before us.

For this manicure, I started with China Glaze - Howl you Doin' as the base. Then, I stamped the lover's skeletons, papel picado (cut paper) pattern, crosses and candles from HD C and HD D plates.
I painted the skeletons using the stamping decal technique.
On my thumb, I applied a combination of stamping sugar skulls and added flower stickers for extra decoration.
*In Mexico, calaveras de azúcar (sugar skulls) are given as a treat for this celebration or as part of the altar. When given to a friend or relative, the name of the receiver is usually written on the skulls forehead. 

Now, the 2nd nail art theme is death as part of life itself.
It is a fact that many people don't like to think about because it may sound gruesome or sad.
The day we are born, we have started a journey that will finish with death.

A part of a dancing skeleton stamped on my nail...
The skeleton is probably mocking us, saying "Cómo me ves, te verás"
(The way you see me now, sooner or later you will look like me).
 ----------------------------------

I hope you liked any of these two nail art that I made for this very special post.
I had to take some time to write something meaningful for this day because this festivity is very close to my heart. So, if you took your time to read through this post, I hope you've learned a little bit about día de muertos.

♥♥Thank you for reading♥♥