News Flash: I'm Still Alive!

Ooof! Another week has passed and I've yet to update my blog. Shame on you, mich!

Buuuuuut.. in my defense, I've been really busy making polishes to fill up the pre-orders that some of you have placed at the end of last year!
After a long two months, I've finally managed to get more suspension bases to mix up a storm. Unfortunately I had trouble securing some other supplies for Wrath, Lust and Envy. I've already been contacting some of you to confirm your orders and there are a few who did not reply so I had no choice but to offer the polishes to the next person on the list.
So... If you have placed a pre-order with me, please check your inbox (the paypal email address that you've used) and the spam folder for updates! 

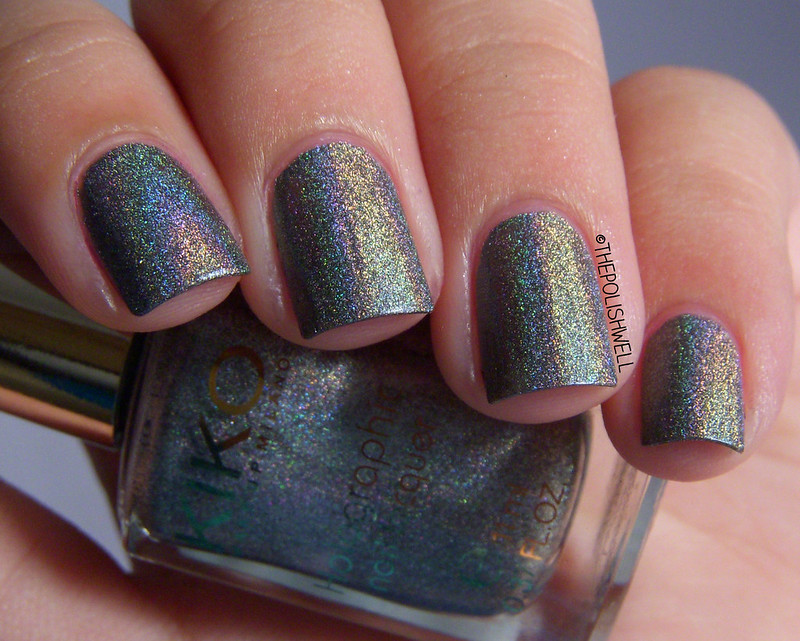
Apart from filling pre-orders, I have also been working on some new colors. Here are some quick and dirty swatches that I've posted on Instagram:


Spring Kisses. 2/3 coats on its own.
Delicate pink flowers blossoming amidst a snowy white base - this is partly inspired by a picture posted on IG by A Lacquered Affair a while ago. I added some fine lavender and holo sprinkles to complete the look.


Water Snake. 3/4 coats on its own.
As this year is the year of the water snake for the Chinese, I mixed up this reptilian franken. It is a dark green (near black) with green flecks and sprinkles of gold.


Blue Bell Bottoms. 2 coats on its own under indirect light.
My first attempt at making holos! I had wanted to try duping DS Glamour but it proved to be impossible. So I gave up and focused on making a blue holo that resembles denim. This picture turned out slightly color inaccurate methinks - it is not as bright and slightly darker IRL. The holo effect is not mindblowingly strong but I'm quite happy with how it looks on this blue. I will definitely try sourcing for some spectraflair to play with next time.
Meanwhile, I will continue to pray that I will find a bottle of DS Glamour some day. I want it soooo much. *writhes about in agony*

So what do you think of these new colors?
Just in case you are wondering, I haven't set a release date yet because I am still sorting out the pre-orders and working on other new colors. Do let me know if you have some ideas you'd like me to try! ^_^

Till next time! <3

xoxo,
mich

Kiko: Lavish Oriental LE

A few months ago, the lovely Sam from Fashion Polish posted some gorgeous kikos on Instagram and had me swooning over them. I was about to throw my hands up in frustration when Sam kindly offered to do a swap with me! As you can imagine I nearly peed my pants - a swap with my nail crush?! I think I died and went to heaven :angel

Of course, after drooling over Sam's swatches on the kiko holos, I knew I had to grab these pretties:


kiko-399-silk-taupe04

kiko-399-silk-taupe03

Kiko 399 (Silk Taupe). 2 coats without topcoat.
A gorgeous nude linear holo. I really really love how it looks on me. So flattering! :L

kiko-400-steel-grey00

kiko-400-steel-grey02

Kiko 400 (Steel Grey). 2 coats without topcoat.
Another beauty. This is a charcoal with very strong linear holo. Super love! <3

The holo in these kikos are very strong and intense especially under direct sunlight and I love how they look in the shade too! *swoon*
Formula is pretty good. I wore them over my usual basecoat (NailTek Foundation II) but I skipped the topcoat because it dulled the holo slightly. I actually wore Silk Taupe to work for a week using the sandwich method (holo-topcoat-holo) and only experienced slight tipwear!

So if you ever come across them in stores, etc, don't hesitate to grab them. I highly recommend them ;)

xoxo,
mich

Nail Ideas: Owl Love You Forever

Oof! Time really flies and it is Valentine's Day again tomorrow! It seems like it was just yesterday when I posted my Valentine's Day nails for last year...

Anyway, this year, I decided to try my hand at another V Day mani and this is what I've got:


Yup, clearly I am still obsessed with owls. They are just so adorable! :L

This is where I got my inspiration from:

source
Here's wishing all of you a very happy and sweet Valentine's Day!

xoxo,
mich

Valentines Day: Leopard Heart Print

Hello dear readers and nail friends!

Today I want to show you a simple nail art using a  nail stamp pattern from my HD - B plate.
I always saw  leopard heart print manicures on my favorite Japanese nail art magazines and thought how cute it looked but I have zero patience for drawing every single shape on my long nails :( this was my inspiration for this design.

(All pictures can be enlarged)
For this manicure, I started with two coats of Orly Prelude to a Kiss (such a lovely name). 
I stamped the leopard heart print using Sally Hansen Insta-Dri Cinna- snap 


I hope you like this manicure :)

 ♥Thank you so much for reading and leaving nice comments♥

Happy Valentines Day!

           @@@   @@@       @@@   @@@       @@@   @@@       @@@   @@@
@ @ @ @ @ @ @ @ @ @ @ @ @ @ @ @
\\\\ @ @ @ @ @ @ @ @ @ @ @ @
------@ )---( @-----@ )---( @-----@ )---( @-----@ )---(
@-------->
//// @ @ @ @ @ @ @ @
@ @ @ @ @ @ @ @
@ @ @ @ @ @ @ @
@ @ @ @ @ @ @ @
@ @ @ @


Nail Ideas: French Manicure!

HAPPY CHINESE NEW YEAR!! Here's wishing all of you an awesome and prosperous year of the Snake in 2013!

I apologize for being away for a while because there was just soooo much to do before CNY! I had been busy with the Chinese New Year decorations, preparations for the reunion dinner annnnnnnddddd doing nails for my aunt, cousin, friend, mum and sis. It was really fun but quite tiring too. I guess I am just not cut out to be a manicurist. :P

In the end, after all the hustle and bustle, I decided to do a simple french manicure for myself:


First, I painted my nails with two coats of OPI My Very First Knockwurst and topped it with Seche Vite. After it has dried, I taped a French tip guide (for some reason I have a bunch of those) over each nail and painted the tips with a metallic/foil silver.

I must say I quite like how it turned out.
What do you think? Do you like french manicures?

xoxo,
mich

Challenge: Valentine's Day

Hello dear readers and nail friends ;)

Here is my first manicure of  2013, this Sunday FB group AIS challenge was a Valentine's day themed manicure. This was definitely a chance to try out and show you what you can do with my new HD-A & HD-B Stamping plates.
(All pictures can be enlarged)
For this manicure, I used Sally Hansen White On as the base.
I stamped the heart pattern, cherub and love word using Sally Hansen Insta-Dri Rapid Red.
For the accent nail, I applied clear nail polish and put heart shaped glitters to frame my nail.

Here's my right hand that you rarely see on my posts :-p
oops, a glitter heart fell off...

♥Thank you for reading my blog and leaving nice comments ♥ 
If you have a request for a nail art idea you would like me to do, let me know by leaving a comment below.

Haters: If you don't like my nails and want to tell me they are ugly and they look like those of a witch, don't waste your time... I will always take that as a compliment... Ha ha ha ;-p

How-To: Clean Up Brush

I have received a few questions on how I paint my nails so neatly so I thought it would be appropriate to do a post on what brushes I use for clean-up.

For those who have not heard of clean-ups before, it is a very simple way to remove excess polish that got onto the cuticles or the sides of the nail. All you have to do is to dip a brush in your nail polish remover and run it along the sides of the nail a few times to get a clean line!

Now, I should probably put a HUGE disclaimer upfront by saying this: 
I know there had been some controversy on this topic because there are a few people who hold strong views on clean-up. For myself, I am neutral on this because I think it is just a matter of personal preference and that's all I am going to say on that matter. So let's not venture into muddy waters, shall we? Instead, this post will focus purely on the brushes that I've tried so far and the views I have on them. 

clean-up-brush00

So these are the two brushes I've tried for clean up.

The battered-looking one on the left is an angled eyeliner brush that I've got from a random beauty store in the mall. It has been with me for almost a year now and suffered the ill-fate of being dropped into a bottle of nail-polish remover. Naturally I panicked and by the time I fished it out, the black paint on the brush handle is almost gone. Nevertheless, it has served me well for longer than I've expected.

Recently, I got another brush from Born Pretty Store because my eyeliner brush is a little worn out. This time I chose a round-tip brush that is probably meant for nail art but I've decided to use it for clean-up purposes anyway.

Here's a quick comparison between the brushes:

clean-up-brush01

clean-up-brush02

They are very different and I like them both for different reasons. I love the angled tip of the eyeliner brush because the tip rests nicely on the sides of my nail. However, I prefer the flatter end of the nail art brush because it gives a more precise clean-up and does not leave a huge gap between the polish and my cuticles.

What type of brush do you prefer?


Just in case you are wondering, you can find the nail art brush (Item ID: 219) at the Born Pretty Store here. They have a wide range of nail products and provide free worldwide shipping! Feel free to quote "HDL91" for a 10% discount when you checkout:


xoxo,
mich

**Products marked with an asterisk are provided for honest review. Please see our disclosure policy for more information**

1st post of 2013: New HD Nail Stamping Plates

Hello dear readers!

I've been absent from this blog for a while because I was preparing the launch of my new HD Stamping plates.

This time, HD plates A and B measure 14.5x9.5 cm and feature holiday and other special occasion designs for: Valentines Day, Easter, St. Patrick's Day, 4th of July, Birthday and Wedding.

(Picture can be enlarged)
Plates are available now through my online store: www.bunnynails.ecrater.com
or by clicking through this link: http://bunnynails.ecrater.com/c/1638963/hd-holiday-series-nail-art
Price: $15.99 each
Free Shipping on my HD plates applies worldwide!

Thank you for reading this short update♥
**Stay Tuned, I will be preparing a giveaway for these 2 plates**

I will do my regular nail art posts in a couple of days ;)

Nail Ideas: Baby Penguin!

I simply must apologize for not posting for the whole of the week again! I had some swatches done last weekend but didn't have the time to watermark them and blog.

To make up for it, I decided to do a quick nail art design for today's post!


A fuzzy baby penguin with some grey flocking powder from Born Pretty Store! Urgh I wish I could cuddle it properly!!

I was inspired to do some penguin nails after receiving this flocking powder set in my mail:

Flocking Powder Set

First, I painted my nails with two coats of Misa's Grey Matters. Then, using the pair of tweezers, I placed some flocking powder over my ring fingernail when the polish is still wet. I took care to make sure every inch of my nail is covered and patted it down gently with the flat side of the tweezer. I waited a short while before using the brush to carefully sweep away the excess powder from my nails. That should give you a nice fuzzy nail.

Then, I went on to paint the details with black and white acrylic paint using a small nail art brush. Of course, I regretted it almost immediately after that. I had a shower and, to my horror, my penguin was gone!! :c The flocking powder stayed flawless on my nail but the details done with acrylic paint were washed away. You can be sure I will be sure to use polish for the details next time!

Some pointers on using the flocking powder...

  • Try to get the flocking powder to cover the entire nail. It will be hard to cover up the bald patches after that. 
  • Choose a base color that is close to the color of the flocking powder so bald patches will not be so obvious.
  • It is easier to use the powder over a regular polish rather than a quick-dry topcoat - the coverage is better and more even because you have more time to pat the powder down onto your nail.
  • Yup, it is ok to get the nails wet. The flocking powder will be damp but it dries fairly quickly and your nails will be back to their fuzzy self in no time at all.


You can find the grey flocking powder (Item ID: 4480) at the Born Pretty Store here. They have a wide range of nail products and provide free worldwide shipping! Feel free to quote "HDL91" for a 10% discount when you checkout:


xoxo,
mich

**Products marked with an asterisk are provided for honest review. Please see our disclosure policy for more information**