Showing posts with label nail ideas. Show all posts

piCture pOlish Blog Fest 2013: Celebrating the Year of the Blogger!


After an agonising month of keeping my mouth sealed, I am happy to say that the day has finally come! Yup! It is time for piCture pOlish's Blog Fest 2013! For those who are new to the scene, piCture pOlish hails from down under and every year, a group of bloggers embark on a massive mission to swatch and showcase new colours from piCture pOlish for polishaholics to drool over. Well, at least that was what happened in the past...

This year, the girls from piCture pOlish decided to catch us all by surprise by having a huge competition instead to celebrate the Year of the Blogger! Yup! They have dedicated this event for all the bloggers and to celebrate what we do ♥ I must say, I was rather surprised and touched when I first heard about the theme for the blog fest this year. I might have mentionned it before but I think there are still many people out there who have the impression that nail blogging is a piece of cake. It looks deceptively simple but bloggers often put in a lot of effort to maintain their nails, painting them as perfectly as possible, photographing them accurately, editing the pictures and finally blogging about them - all these on top of living a regular everyday life (yes, we really do engage in other activities apart from painting our nails). For me, it has become slightly more challenging this year when I took on a full-time job after my graduation. I am often bone-tired after work and there were several occasions when I felt like throwing in the towel so that I can rest a little more during the weekends... but your comments kept me going, so here I am! ♥

So, before I digress further and get all soppy, let's talk about the competition, shall we? On 29 July, 7pm, local time, participating bloggers will showcase their own nail art creation to take part in the competition. All nail art creations will go into the running to be chosen to.... create a collaboration shade with piCture pOlish!! *excited dance* There are only three winners though - 1 voted by all of you, 1 voted by the participants and 1 chosen by the girls from piCture pOlish.

For this competition, I was given these three shades to work with:


Stunning, aren't they? I will post swatches of each of them but first... let's take a look at what I came up with. After wrecking my brains out, I've decided to unleash my inner Pollock to create this mani:


If you have been following me for a while, you would probably know that I can't really draw to save my life. And you should also know that it doesn't stop me from doing nail art ;) After all, there are plenty of nail art techniques that are really simple and idiot-proof! This is one of them. All you need is some pretty colours, a fan brush and follow these steps:


  1. Start the manicure with a coat of base coat to protect your nails.
  2. Paint your nails with a coat of white as the base colour and let dry.
  3. Drop a drop of polish on a piece of paper.
  4. Dab the fan brush lightly against the drop of polish so that the tips of the brush pick up some polish. You would want only a small amount of polish to get a streaky brushed look. 
  5. Run the fan brush down (or up) your nails to get streaks on your nails.
  6. Repeat steps 2-4 with other colours.
  7. Once satisfied, seal the design with top coat and you are done! (Clean up required, of course)

Because the design is really simple, you are free to use any colours that you like. Personally, I think analogous colours with a splash of complementary colour work very well to create a striking combination. If you like some texture, you may use varying shades of the same colour or make use of slightly sheerer colours to create the illusion of depth. The trio from piCture pOlish were perfect for this and that was one of the main reasons why I went with this design. 

Now for swatches of each of the colours:

picture-polish-flirt

Flirt. 2 coats.
A bright magenta that certainly deserves that warning label on the bottle. And yes, it is more flirtatious than sweet so bring it on ;)
Before I forget, this hawt babe is a one-coater that applies itself. Super fantastic formula.

picture-polish-violet-femme

Violet Femme. 3 coats.
A deep bright purple that is slightly sheer but builds up to opacity nicely. Dries to a matte-satin finish - I think it really does have neon pigments! - so a top coat is definitely needed. I really love this shade of purple.

picture-polish-kryptonite

picture-polish-kryptonite2
Kryptonite. 3 coats.
Now this is my kind of kryptonite. A deep dark green with chunks of holo particles and shimmers. Wonderfully shimmery and mysterious in the shade but all glowy and sparkly then it catches the light. You absolutely need to click through on the picture and look at the details in the original reso. I did not manage to catch the holo action but trust me, the chunky particles swimming in the dark green base is enough to make you weak all over too - well, maybe except the nails, they will be superhuman.


piCture pOlish is available on their webstore (everyday deals and international shipping available!) or through their network members. You can also follow them on Facebook, Twitter, Pinterest and Instagram for more updates.


 photo xoxo_zpsaad7ebe5.png

**Products were provided for contest participation. All views expressed are our own honest opinions. Please see our disclosure policy for more information.**

China Glaze: Sunsational Cremes


Hola!! After enduring a terrible work week, I thought I would chase away all my sorrows and brighten up my weekend with some neons (pun completely intended)!

Despite all the hype over neon colours in the polish community, I have always avoided neons because I found them too stark and too eye catching for my taste... that is, until I saw the promotional pictures of China Glaze's neon releases for summer 2013. The pastels called to me and my eyes were immediately drawn to the blues and greens. I knew I had to have them. And I was right! Take a look:


Disclaimer 1: I've tried my best-est of best-est to get colour accurate pictures but my camera just refused to handle so much awesomeness. They are brighter in person.

Disclaimer 2: I did not go for any tanning session. The neons are so bright that my camera (and even my eyes) decided that I must have become tanner some what. Silly them.

china-glaze-too-yacht-to-handle

Too Yacht to Handle.
Yup, this is a almost-neon sister of the famous For Audrey. It looks identical to For Audrey but when you put them side by side, you will notice the difference immediately. Too Yacht to Handle is a bajillion times brighter and For Audrey looks really dusty in comparison. Too Yacht to Handle also comes across as being slightly greener. Both are gorgeous in their own right.

china-glaze-highlight-of-my-summmer

Hightlight of My Summer.
A yellow-leaning pastel mint green. I really like it more than I'd expected. It is really bright. I'd thought Illamasqua Nomad is bright but it pales next to Highlight of My Summer. Nomad also has a tinge more blue than Highlight of My Summer. Yup, I do love these two colours.

china-glaze-sun-of-a-peach

Sun of A Peach.
An eye-searing neon peach. Ughhh I love this so much - unexpected favourite. Awesome colour with an awesome name to match. Just plain awesome. I wore it when I dropped by my workplace during my call break (needed to settle some personal matters) and my friend was completely blown by how fluorescent my nails were. Yup it is that bright.

china-glaze-neon-on-on

Neon & On & On.
A neon pink with just a touch of coral. I thought I wouldn't like it but the coral is making me mince my words. Also an unexpected favourite.

china-glaze-bottoms-up

Bottoms Up.
A neon bubblegum pink with a touch of blue. I am sure this would grace Barbie's nails during summer.

china-glaze-thats-shore-bright

That's Shore Bright.
A bright red-leaning purple. The least neon of the collection - is it a neon? Nonetheless, it is still a fun summery colour to sport.

Now, you may have already heard of this already. The formula of these colours are not the nicest to work with. They apply streakily and do not level on their own. I suspect the white in the pastels is not playing nice - as usual. I found that it helped a little to use piCture pOlish's Revolution (meant to be a glitter base but it did not work as well as I had hoped it would be) - the colours applied less patchily that way. Seche Vite did wonders to level out the streakiness as well.

Nonetheless, I am really head-over-heels in love with the sunsational cremes. I liked that they are not the usual highlighter colours. They look less stark that way, don't you agree?

Ever since I have received them in my mail, I've pulled them out countless times to wear them one way or another. Just before I came back to work, I did this completely work-inappropriate mani just because I can ;)

nail-art-china-glaze-sunsational

I started with a white base and randomly sponged on the colours from the Sunsational cremes before topping them with a coat of black shatter. Oh yes, shatters do look good once in a while ;)

So what do you think of the Sunsational cremes?
My personal favourites are Sun of a Peach, Too Yacht to Handle, Highlight of My Summer and Neon & On & On... ok. That's not really helping :P
Which colour is your favourite?

Stay tuned for swatches of the other half of the collection ♥

 photo xoxo_zpsaad7ebe5.png

**Products were provided for our honest review. Please see our disclosure policy for more information.**

NCLA Nail Wraps: Aqua


Oh hello weekends! I know I ought to be perkier than this but I am completely exhausted after an informal chill-out session with my colleagues at my boss' place last night - the official event was named "primer on wine and cheese tasting" but it was much more fun than having a lecture of sorts and I really enjoyed myself there. Don't worry, I didn't indulge in too much alcohol (I can't really drink!) and didn't make a fool of myself in front of my bosses (I think).

Anyway, a quick post before I KO for the day. As promised here's a swatch of the second nail wrap design that I've picked from Nail Polish Canada:


Aqua (2 coats of top coat).
A simple but beautiful color-blocking design. I have been meaning to do a color-block like this since forever but I never got around to doing it because I dread fumbling with the tape - I suspect I spend more time untangling myself from the roll of tape than creating the design on my nails. Oh wells.

For details about the application of these NCLA nail wraps, head over and check out my previous post here.

There are many more pretty designs available on Nail Polish Canada here.

So what do you think of these nail wraps? What are your experiences with them?


 photo xoxo_zpsaad7ebe5.png

NCLA Nail Wraps: Reflect Yourself


A while ago, Nail Polish Canada started to carry the popular NCLA nail wraps in their store and contacted me to do a review. After starting working, I hardly had the time to do nail art so you can imagine my joy and excitement at having the chance to wear fancy nails after so long! There are several gorgeous designs available at NPC and it took me a long time to decide on two designs.

This is the first design that I've picked:


ncla-nail-wraps-reflect-yourself03

Reflect Yourself.
A beautiful mosaic design that makes me feel like my nails are encrusted with jewels.

Application is very simple. The official instructions are:

  1. Clean your nails with nail polish remover.
  2. Apply a coat of clear nail polish - let dry.*
  3. Choose the right size for each nail and peel from the sheet by the flap (the tab).
  4. Apply the round side against the cuticle. Wrap can be removed and stretched to fit.
  5. Once in position, firmly flatten the wrap starting from the cuticle. 
  6. Use the nail file to file away the excess in a downward motion.
  7. Apply another coat of clear polish for seal and shine.
  8. Removal: simply peel them off your nails. 

*I definitely recommend applying a coat of clear polish before any application. This will help to protect your nails when you remove the wraps. The nail wraps are quite adhesive because, well, they are meant to stick onto the nails firmly. While this is good, it may peel off the top layer of your nails if you apply the wraps directly onto your bare nail. I applied a coat of base coat and a coat of top coat (a little too much? lol!) before using the nail wraps and the wraps only took off small pieces of the top coat without damaging my nails.

I am pleasantly surprised to find the smaller nail wraps nicely sized for my nails. I could apply most of them directly without any trimming. For the ones that are slightly larger, I trimmed them slightly with a pair of scissors before peeling them from the sheet and applying them on my nails.

The wraps are thin and very easy to apply. While I did not have to stretch them because my nails are relatively flat, I did notice that the wraps are very flexible and it should be able to stretch to fit curvier nails without any trouble as well. 

Unlike the other nail wrap that I've tried previously, the NCLA nail wraps do not disintegrate with a top coat (thankfully!). I put two coats of top coat over the wraps to give them a mega-shine.

Each nail wrap kit is US$16 and comes with 44 wraps of different sizes (printed on 2 sheets) and one nail file. Quite value for money if you ask me. There are enough wraps to use for at least 4 manicures - more if you do not discard the excess from the larger wraps. Of course, it is also good as a quick and easy accent nail to spice up a manicure:


ncla-nail-wraps-reflect-yourself01
OPI DS Extravagance with Reflect Yourself on accent
You can see the range of designs available at Nail Polish Canada here. The nail wraps ship free within Canada (and the US?) - no minimum purchase required!

Stay tuned for the second design that I've picked! It's a beauty too <3

What do you think of the NCLA nail wraps? Have you tried them before?


 photo xoxo_zpsaad7ebe5.png

*Product provided for our honest review. Please see our disclosure policy for more information.*

Nail Ideas: Classy Studdicure


Erm, so yes, I don't really know what to name this post BUT let's not dwell on my lack of creativity and focus on these pretty studs instead:


I was browsing through the Born Pretty Store online when I chanced upon this set of studs and I knew I simply had to have it. There are 12 different kinds of studs - oh, just imagine the possibilities!

Of these, the donut / wheel stud caught my attention immediately. I haven't actually seen it being used before so naturally I had to try my hand at it and this is what I (finally) came up with:

nail-art-studs

A simple design with a silver donut/wheel stud and two black studs, one in the center of the silver donut/wheel stud and the other just below it. I started with two coats of Orly White Champagne - a beautiful shimmery white. Then, I topped it with a coat of Seche Vite and stuck the studs on it before the topcoat dries. I thought the donut/wheel stud stuck out a little at the edges but it was surprisingly firm on the nail. I didn't leave it on for too long though so I am not sure if it will last beyond a day.

To be honest, I am on the fence for this one. It looks a little strange close up but I think it looks rather classy at a distance - probably something I can wear to a semi-formal event?

What do you think of this manicure?

Just in case you are wondering, you can find this set of studs (Item ID: 4993) at the Born Pretty Store here. And it looks something like that:


It is such a convenient and neat way to keep the studs! All you have to do is to turn the plastic cover and position the hole over the studs that you want.

Here's a quick view of all the studs in their little compartments without the plastic cover:


Born Pretty Store also has a wide range of nail art products and provide free worldwide shipping! Feel free to quote "HDL91" for a 10% discount when you checkout:


 photo xoxo_zpsaad7ebe5.png

**Products are provided for honest review. Please see our disclosure policy for more information**

Nail Ideas: St. Patrick's Day Manicure!

Happy St. Patrick's Day everyone!

Although we don't celebrate St. Patrick's Day in Singapore, I couldn't help joining in the fun after seeing so many St. Patty's Day manicures on Instagram! So here's a quick manicure for the day:


Of course, it had to be green! I used OPI Stranger Tides as the base color. Then, using a fan brush, I added stripes with Color Club Kismet (for a glimmer of the mythical gold and rainbow) and a-england Dragon. Here's a quick tutorial by simplenailartdesigns for those who are interested. My stripes are a little sparse though and I thought it ended up looking a little like the spun sugar / stringing mani I did before!

What do you think of this mani? How are you celebrating St. Patrick's Day?

On another note, I've just realized that Google is killing Google Reader for some unfathomable reason. The service will end on the 1 July 2013 so if you have been following our blog and other nail blogs via rss feed on Google Reader, you may want to consider hunting around for an alternative. There are plenty of articles floating on the net on this topic - eg. lifehacker. Alternatively, you can also find us on bloglovin'! <3

xoxo,
mich

Nail Ideas: Owl Love You Forever

Oof! Time really flies and it is Valentine's Day again tomorrow! It seems like it was just yesterday when I posted my Valentine's Day nails for last year...

Anyway, this year, I decided to try my hand at another V Day mani and this is what I've got:


Yup, clearly I am still obsessed with owls. They are just so adorable! :L

This is where I got my inspiration from:

source
Here's wishing all of you a very happy and sweet Valentine's Day!

xoxo,
mich

Nail Ideas: French Manicure!

HAPPY CHINESE NEW YEAR!! Here's wishing all of you an awesome and prosperous year of the Snake in 2013!

I apologize for being away for a while because there was just soooo much to do before CNY! I had been busy with the Chinese New Year decorations, preparations for the reunion dinner annnnnnnddddd doing nails for my aunt, cousin, friend, mum and sis. It was really fun but quite tiring too. I guess I am just not cut out to be a manicurist. :P

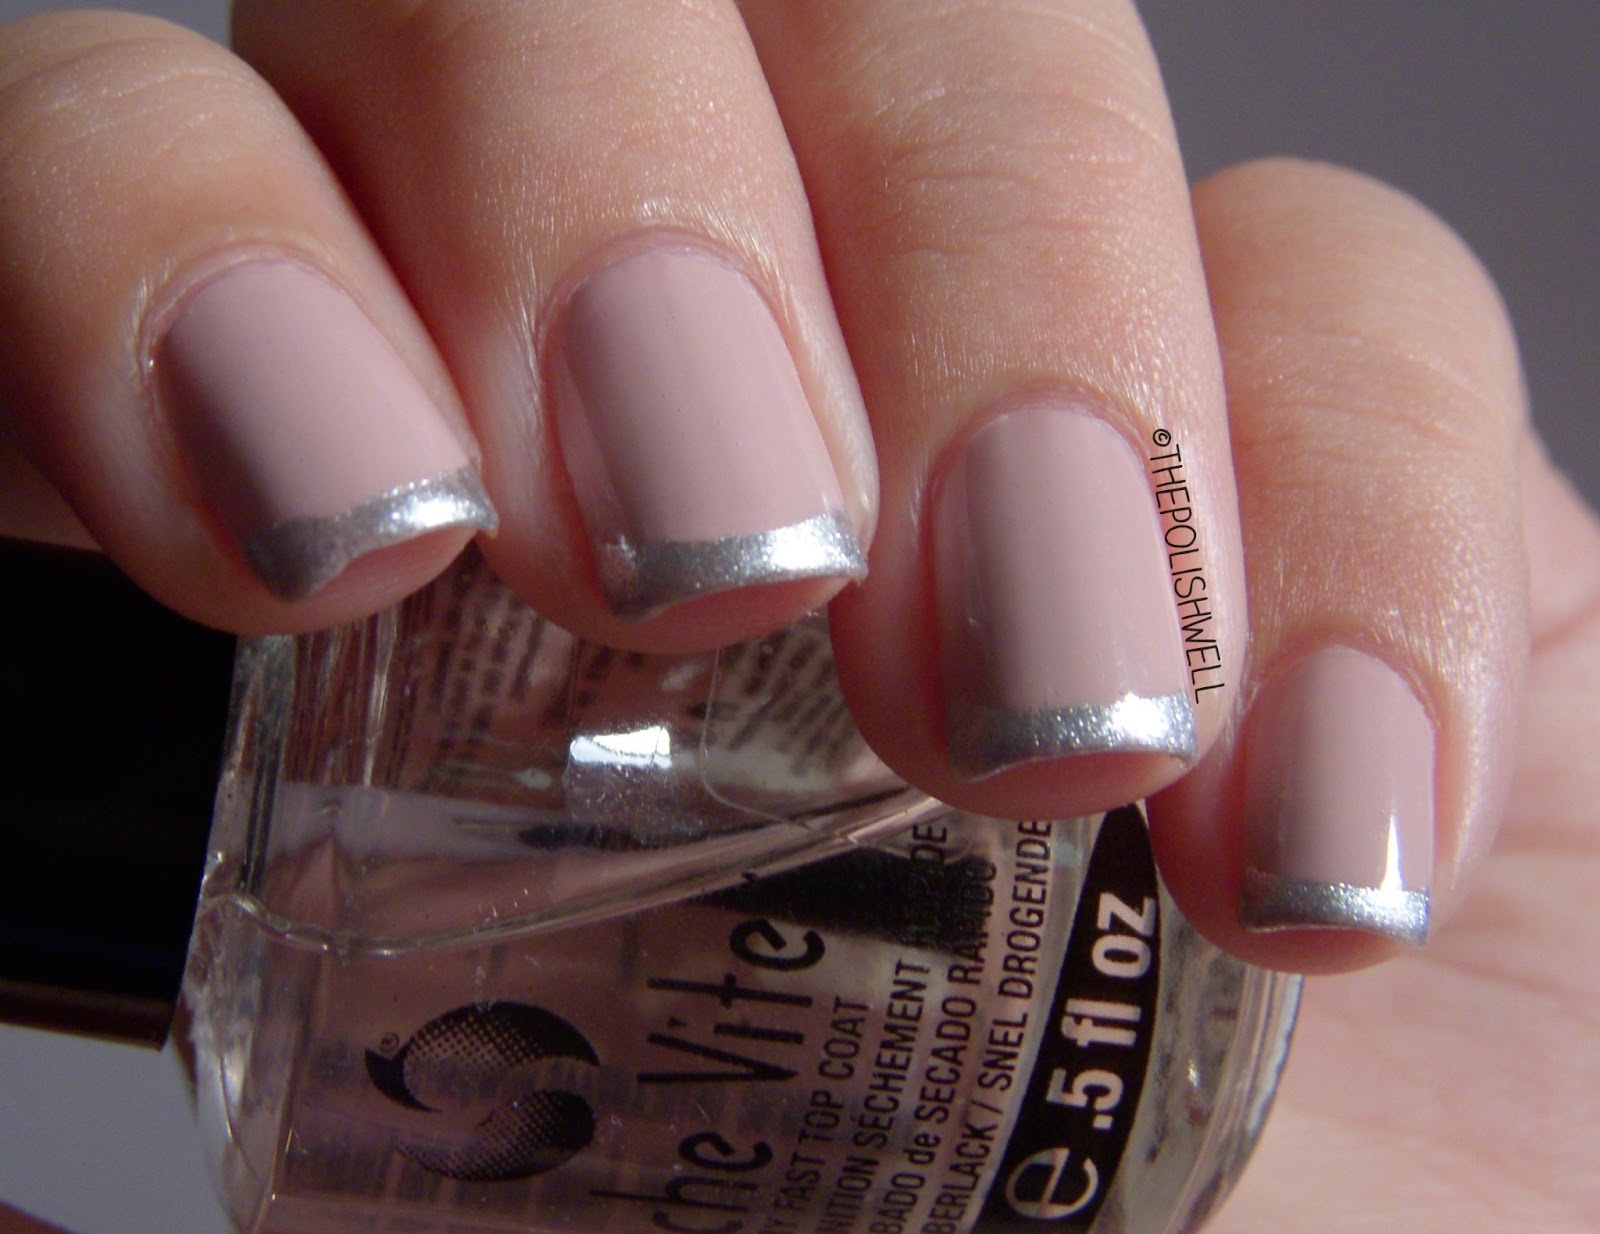
In the end, after all the hustle and bustle, I decided to do a simple french manicure for myself:


First, I painted my nails with two coats of OPI My Very First Knockwurst and topped it with Seche Vite. After it has dried, I taped a French tip guide (for some reason I have a bunch of those) over each nail and painted the tips with a metallic/foil silver.

I must say I quite like how it turned out.
What do you think? Do you like french manicures?

xoxo,
mich

Nail Ideas: Baby Penguin!

I simply must apologize for not posting for the whole of the week again! I had some swatches done last weekend but didn't have the time to watermark them and blog.

To make up for it, I decided to do a quick nail art design for today's post!


A fuzzy baby penguin with some grey flocking powder from Born Pretty Store! Urgh I wish I could cuddle it properly!!

I was inspired to do some penguin nails after receiving this flocking powder set in my mail:

Flocking Powder Set

First, I painted my nails with two coats of Misa's Grey Matters. Then, using the pair of tweezers, I placed some flocking powder over my ring fingernail when the polish is still wet. I took care to make sure every inch of my nail is covered and patted it down gently with the flat side of the tweezer. I waited a short while before using the brush to carefully sweep away the excess powder from my nails. That should give you a nice fuzzy nail.

Then, I went on to paint the details with black and white acrylic paint using a small nail art brush. Of course, I regretted it almost immediately after that. I had a shower and, to my horror, my penguin was gone!! :c The flocking powder stayed flawless on my nail but the details done with acrylic paint were washed away. You can be sure I will be sure to use polish for the details next time!

Some pointers on using the flocking powder...

  • Try to get the flocking powder to cover the entire nail. It will be hard to cover up the bald patches after that. 
  • Choose a base color that is close to the color of the flocking powder so bald patches will not be so obvious.
  • It is easier to use the powder over a regular polish rather than a quick-dry topcoat - the coverage is better and more even because you have more time to pat the powder down onto your nail.
  • Yup, it is ok to get the nails wet. The flocking powder will be damp but it dries fairly quickly and your nails will be back to their fuzzy self in no time at all.


You can find the grey flocking powder (Item ID: 4480) at the Born Pretty Store here. They have a wide range of nail products and provide free worldwide shipping! Feel free to quote "HDL91" for a 10% discount when you checkout:


xoxo,
mich

**Products marked with an asterisk are provided for honest review. Please see our disclosure policy for more information**

Nail Ideas: Vintage / Retro Water Marble

Happy Sunday everyone!!

I finally had some time last weekend to do some nail art! After much thought, I decided to practice my water-marbling again:


I was feeling slightly retro-ish for some reason so I went with these colors: OPI Barre My Soul, OPI Sparrow Me The Drama and Zoya Bevin. I love the color combination but I think I still need to work on my water-marbling. For some reason, the center is not particularly neat - I tried to pull the design closer to the center but I end up with bald spots if I poke at it too much. Perhaps I should have added more drops of polish before dragging the design; that might give me more polish to prod about. :/ What do you think?

xoxo,
mich

12 Days of Round-Up: Nail Art Edition!

Finally, the last instalment of the Round-Up posts!

I actually had other plans for this post but I was tagged on Instagram to share some of my favorite manicures for 2012 and this came up:


Yup! My favorite mani-s in 2012 are all nail art! :L

I decided to include this collage here as a New Year's resolution of sorts - to remind myself not to give up on nail art despite having to start work this year. So far, I haven't work on the resolution yet but I promise I will try once I get used to working! For now, I am still very exhausted after work each time. xP

What are some of your favorite mani-s for 2012?
Have you started working on your New Year's resolution yet? ;)

xoxo,
mich

Nail Ideas: New Year Mani!

Happy New Year to all of you!! May 2013 be an awesome year for us all! :party

Here's also a quick mani that I did to usher in the new year:


Yup! This is also my first attempt at striping tape mani! I got some striping tape* from Born Pretty Store a while ago and finally got around to using it!

I started off the mani with two coats of China Glaze I Herd That and I'm Not Lion. After it has dried (with the help of Seche Vite), I cut short sections of striping tape and stuck them firmly on each nail randomly before painting Zoya Raven over it. Immediately after painting the black, I used a tweezer to carefully remove the tape in the reverse order to ensure the lines remain crisp.

It is my first time using striping tapes and I must say I am very happy with how it turned out. The tape sticks on well to the nail but does not rip off chunks of polish when I remove it (which happened for the usual sticky tape that I got from bookstores) - perfect for all the nail art needs!

You can find the striping tape (Item ID: 1019) at the Born Pretty Store here. They provide free worldwide shipping! Feel free to quote "HDL91" for a 10% discount when you checkout:


xoxo,
mich

**Products marked with an asterisk are provided for honest review. Please see our disclosure policy for more information**

12 Days of Round-Up: Nail Polish Trends in 2012

Good morning everyone and MERRY CHRISTMAS to all of you!! May each Christmas be the warmest and most wonderful one for you and your family! Of course, I trust that we have been good all year so I hope that our Christmas stockings are filled all that we wished for too! ;)

Today also marks the first of our 12 Days of Round-Up series so let's begin with a brief recap of the nail polish trends that have fought for the spotlight in 2012!

Perhaps they were feeling the heat from the indie polish makers... 2012 turned out to be a busy year for the nail polish companies. Apart from cranking out new shades, they have worked very hard, sometimes too hard, to put out innovative nail polishes to satisfy our never-ending demands for fresh new manicures. 

OPI Spotted

No doubt, the shatter/crackle trend is so two-thousand-and-eleven - yes, that includes glitter shatters/crackles *looks at OPI and CG* But when OPI released Spotted exclusive to France as part of the Amazing Spiderman Collection, the nail community went into a frenzy and everyone wanted a piece of it. And it is not hard to see why! Leaving aside the fact that it has been labeled with the magic word "exclusive", OPI Spotted creates a more elegant and mysterious shrouded effect as compared to shatters/crackles. While the latter gives a punk-rebel look, Spotted exudes more style and class. 

Application is not easy though. The base color must be completely dry or Spotted will crack. For the best results, you must use very very thin coats or the effect won't show. Clearly I still need to work on my application. Wear time isn't fantastic either and it peeled off with the top coat (leaving behind the base color) on my second day. For more details, you can check out Nailderella's post

Unfortunately, this is (was?) only available in France because of a substance that was prohibited in some other countries. Alternatively, you may consider the Layla Bubbly Effect polishes in a range of colors - although I think black is the most elegant color for this effect.

Caviar / Fishegg Manicure

Craft beads on the ring finger; Jelly sandwich with OPI Houston, We Have a Purple and Pirouette My Whistle on the rest
Now, this is a trend that got entangled with some controversy when Ciaté attempted to claim intellectual property rights over it. That aside, I was not too impressed with the look when I first heard of it. Being a typical pragmatic Singaporean, I wondered if the beads will even stay long enough on the nails for the day. It would look pretty ugly if bald patches start appearing on my nails.

I finally took the plunge and wore it for my mum's birthday dinner since it is just a quick and small family affair. Instead of putting the beads over a wet mani, I stuck them over a coat of PVA glue and they held up pretty well. Removal was also easy since I could just peel the beads off in one sheet. The only downside was that the glue turned wet each time it comes into contact with water so I think I will try something else next time, if I even do it at all. It didn't look too bad but it wasn't very impressive either. I ended up touching it the whole time just because I was fascinated with the texture. lol!

Velvet Manicure

Source
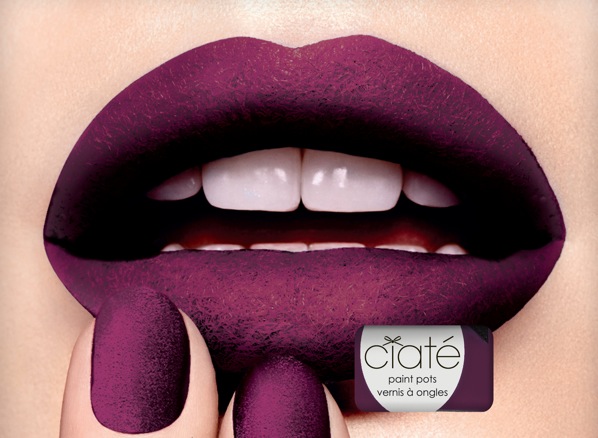
Right after opening a can of fish-eggs, Ciaté forged ahead by launching velvet manicure sets. Hmmm.. I'm not too impressed with the look but it does look classier than the caviar. I have yet to try it for myself though so I may change my mind. But for now, I am not in a hurry to get my hands on those flocking powders.

Magnetic Polishes

Source: scrangie
Strictly speaking, magnetic polishes may have been around even before 2012 but most of the big brand companies jumped onto the bandwagon this year. Before we knew it, the whole market was flooded with magnetic polishes from high-end brands like Deborah Lippmann to drugstore brands... you get the idea.

I had been really attracted to the idea at the start of the year but my interest kind of withered out even before I bought one to try for myself. There are just too many of them! Admittedly, there are some that stood out from the rest by having different magnetic designs or adding holo glitters (OPI) so those are the ones that I would try if I ever decide to.

For a useful post on how to work with magnetic polishes, please see this on Scrangie's.

Goldleaf Toppers

zoya-glitzy00
Zoya Gilty over China Glaze For Audrey

Gold - the one metal that has captured human hearts since time immemorial. So, it is really not that surprising to see a brief gold craze when the big brand companies (OPI and Zoya) started to release their own goldleaf toppers late this year. They were not the first to have goldleaf toppers but they definitely made a huge wave with their large followings.

I did my best to resist but my resolve crumbled into pieces in no time at all (I'm only human!). Thankfully, Lacey from Lace and Lacquers offered to help me get Zoya's limited edition (damn those magic words) Gilty set. She also sent me a freaking awesome swap package but that's a story for another day (I really need to stop procrastinating with my blogposts).

To be honest, I am not a normally a gold lover because it can come across as being too heavy sometimes but I love how the goldleaf topper adds just the right amount of class and luxury without overdoing it. I think it is the only way I will ever wear yellow gold. It is also versatile and goes really well with several colors. This is one of the rare times I splurge but at least I know I won't be buying real diamond polishes. :et

If you have missed the boat for Zoya's Gilty, you can also consider Ninja Polish's gold (The Midas Touch) and white gold (He Went to Jarred) topper.


So, after hearing so much talk from me, what do you think of the nail polish trends in 2012? :i
Which nail polish trend caught your heart and which did not make the mark?

xoxo,
mich

Nail Ideas: Studded Nails

To celebrate the end of exams and to mark the end of a long hiatus, let's start off with a simple nail art!


After being cooped up at home for so long, I decided to bust out my Born Pretty studs and rock some attitude on my tips. I started off with one coat of Nails Inc Black Taxi and added the studs onto my ring fingernail while the polish is still tacky before finishing the mani with a thick coat of Seche Vite. It is really simple but the final look is very striking! 8)

I've worn this manicure for almost two days now and I'm really impressed to find the studs holding on so well (only the one near the free edge got scratched off). I can't wait to try out other designs with these studs!

Just in case you are wondering, I got the studs (Item ID: 2401) from Born Pretty Store and you can find them here.
You can also use our coupon code for a 10% discount by entering "HDL91". There are plenty of nail art supplies that you can find in their store at a reasonable price so I will definitely recommend this store if you are into nail art.


More swatches to come soon - if I could bear to remove this mani, that is. :P

xoxo,
mich

**Product was provided for our honest review. Please see our disclosure policy for more information.**

Born Pretty Stamp Plate: M60 & How I Re-Learnt Stamping

I've always thought that nail stamping is like cycling - once you've picked it up, you will never forget how to do it. So, when I was asking to pick an item from Born Pretty Store for review, I happily opted for a plate with full-nail designs, thinking that I am able to stamp easily like a pro. WRONG. My first few tries after a long hiatus were complete disasters and almost left me in tears. :c Thankfully, I managed to re-master the skill to try the beautiful designs on this stamp plate:


The Born Pretty stamp plate M60* is a dupe plate for the Konad M60. I was drawn to this plate immediately because I love almost all of the designs on it.

As much as I love the designs, I nearly gave up on the stamping because I couldn't get enough polish in the grooves to stamp with. I tried polishes from different brands and ran into the same trouble each time. After googling around a bit, I found out that I was scraping off too much polish because I was holding the scraper at too low an angle. After I reposition the scraper at approximately 45 degrees, I finally managed to get enough polish in the grooves for stamping:


Polishes used:
Megan Miller Roja* - base color
Black from Essence's My Sparkling Acrobat duo - stamping color

Hmmm, I definitely need to work on my positioning - the design is slanted on some of the nails.

Having learnt a huge lesson in stamping, I've decided to include it in my tips for nail stamping. Here's the revised list:
  • It helps to paint a (fast-drying) top coat over the base color before stamping.
    • If the stamping goes wrong, just lightly wipe it off the nail immediately with some nail polish remover and you can stamp away without repainting the whole nail again.
    • As a follow on from the previous tip, you need not be worried that the french tips designs on the plates are too big for you - just clean up with a little remover to keep the design on the tips only.
  • Experiment with different polishes for stamping - but any pigmented one-coater should get the job done.
    • Try to avoid quick-dry polishes if you are new to stamping and can't work that quickly.
  • Work fast to scrape excess polish and pick up the design with the stamper before the polish dries.
    • It helps to leave the polish bottle uncapped when you're doing your stamping.
  • If you are scraping off too much polish from the design
    • Make sure that the plate is dry (no acetone, etc) before you paint on the plate
    • Make sure that you position the scraper at approximately 45 degrees - you are likely to remove too much polish if your scraper is angled lower than that. 
  • If you are not picking up the design,
    • Clean the plates with some remover to get rid of the dried polishes in the grooves,
    • OR check if there is a thin plastic film covering the plate - peel that off first! Don't worry, you're not the only one who didn't know that (speaking from personal experience o"o).
  • You can take some time to position the image over your nail before stamping. The image will still transfer onto your nail even though the polish has sort of dried. (I am not too sure how long you can wait but I sure took a few seconds to position the stamper before I stamped)
    • I rest the edge of the design against the side of the nail before stamping the whole nail in a rolling motion - this helps to get the stamping straight.
You can find this stamp plate at the Born Pretty Store here. They provide free worldwide shipping! Feel free to quote "HDL91" for a 10% discount when you checkout:


On a random note, my sister seems to like nail stamping a lot - each time I take out my stamping kit, she will ask me to stamp her nails for her. Hmmm, I wonder if I can persuade her to get me some stamp plates for Christmas. ;)

Do you have any stamping tips to share? Let me know in the comments below! :$

xoxo,
mich

**Products marked with an asterisk are provided for honest review. Please see our disclosure policy for more information**

Nail Ideas: Fall Trends with Essence!

Essence has been one of my favorite brands in Singapore - not only do they have a nice range of core colors and interesting trend editions, they are also very affordable and wallet-friendly! So, when I was offered the opportunity to work on some blogposts with Essence Cosmetics Singapore, I was more than happy to give it a shot. :$

With a nail contest just round the corner, I set out to do some nail designs with some Essence polishes! Since it is technically fall now, I've sought inspiration from some of the fall trends that have caught my eye :i


Bohemian!
The earthy colors in fall are simply perfect for rocking some boho-chic on the nails. I've always loved the bohemian style - understated, casual yet sexy and spirited. :L

For this look, I started with a clean nude base using Essence's Toffee To Go before free-handing the details with a brush with these colors: Essence's Just in Case, Wanna Say Hello, Luxury Secret, Princess Prunella, Camouflage and acrylic paint in silver and gold. I'm quite pleasantly surprised by how good the colors look together!


Splatter!
The splatter technique is a fun and easy way to give your nails a funky and edgy look! Simply dip a straw into some polish (ensure that there is enough polish in the straw) and give a strong quick puff through the other end to create the splattered look. It took me several tries and some practice before I managed to get a relatively decent splatter mani. So don't give up if you can't get it on your first try! A warning though... this can get really messy so make sure you cover up your workspace and tape up around your nails to avoid too much clean up!

For this look, I started with a nude base using Essence's Toffee To Go before creating the splatters with Essence's Just In Case, Wanna Say Hello, Princess Prunella and Camouflage. I also added a touch of black for an added contrast.


Equestrian Stripes!
The equestrian trend is also hot this season for its classy and elegant look. For this look, I decided to stick to a simple design for a more sophisticated feel.

I started with a silver base using Essence's Luxury Secret and matted it. Then, I added simple stripes using Essence's Wanna Say Hello. I'm loving the contrast between the matte and gloss! :$

Phew! That was some nail art spam!
So, are you inspired to do some nail art now? If you are, do stay tuned to Essence Singapore's Facebook page for more details about the nail art contest! you can head over to Essence Singapore to take part in their Nail It! nail art contest. Contest ends 7 Nov so get your creative juices running!

I will also be posting up swatches of the colors I've used in these designs so keep a look out for some goodies coming your way! ;)

xoxo,
mich

**Some products used in this post are provided for honest review. Please see our disclosure policy for more details.**