As I promised, here is the tutorial on how to make nail decals by using designs from nail art plates.
I will describe all the steps below the image.
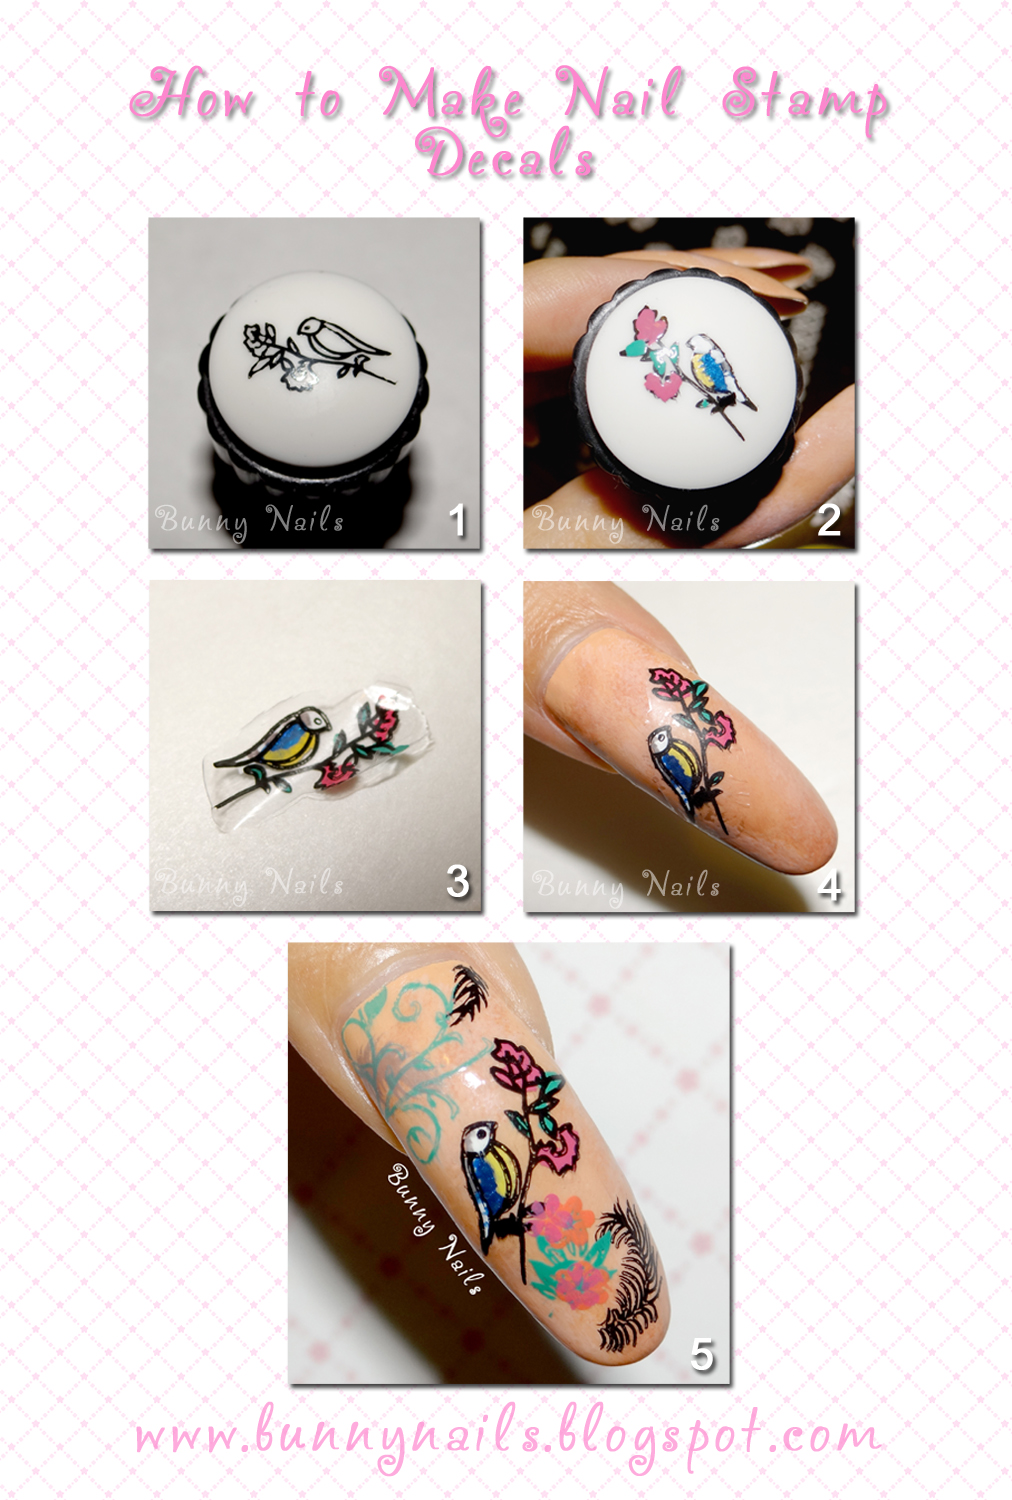
Step2: With the design still on the stamper, paint inside the image using a small brush or with your nail polish brush. Nail polish or acrylic colors can be used. Let dry. *Cover the design using a clear topcoat and let dry. I used Out the Door fast dry top coat. it makes this process much faster ;)
Step3: Once the design is dry, peel off using tweezers (or in this case, my own nails).
Step4: Apply clear topcoat on your nail color base. This step is important so that the surface is sticky enough for the decal to stick on your nail. *Make sure to let dry the topcoat a little bit before applying the decal, it should be dry to the touch but a little bit sticky. Place the decal on your nail and smooth it out carefully to get rid of creases or air bubbles.
Step5: Apply clear topcoat to protect and give shine to your decal. You can add other details before applying topcoat.
I hope this tutorial will be useful to you and that you now will be able to try this nail art ;)
If you have any questions, let me know by leaving a comment :)
♥♥Thank you so much for reading♥♥